
Create and organize
Create and edit tasks, then manage status, dates, labels, projects, areas, subtasks, and dependencies.
Create a task
- Open My tasks, an area's Tasks tab, or a project's Tasks tab.
- Select Add task... in the group where the task belongs.
- Enter a clear title.
- Press
Enterto create the task.
Plot uses the current group, view, and area to set useful defaults.
Edit a task
Select a task to open its details. Edit the title or description directly.
The properties panel keeps the task's working details in one place.
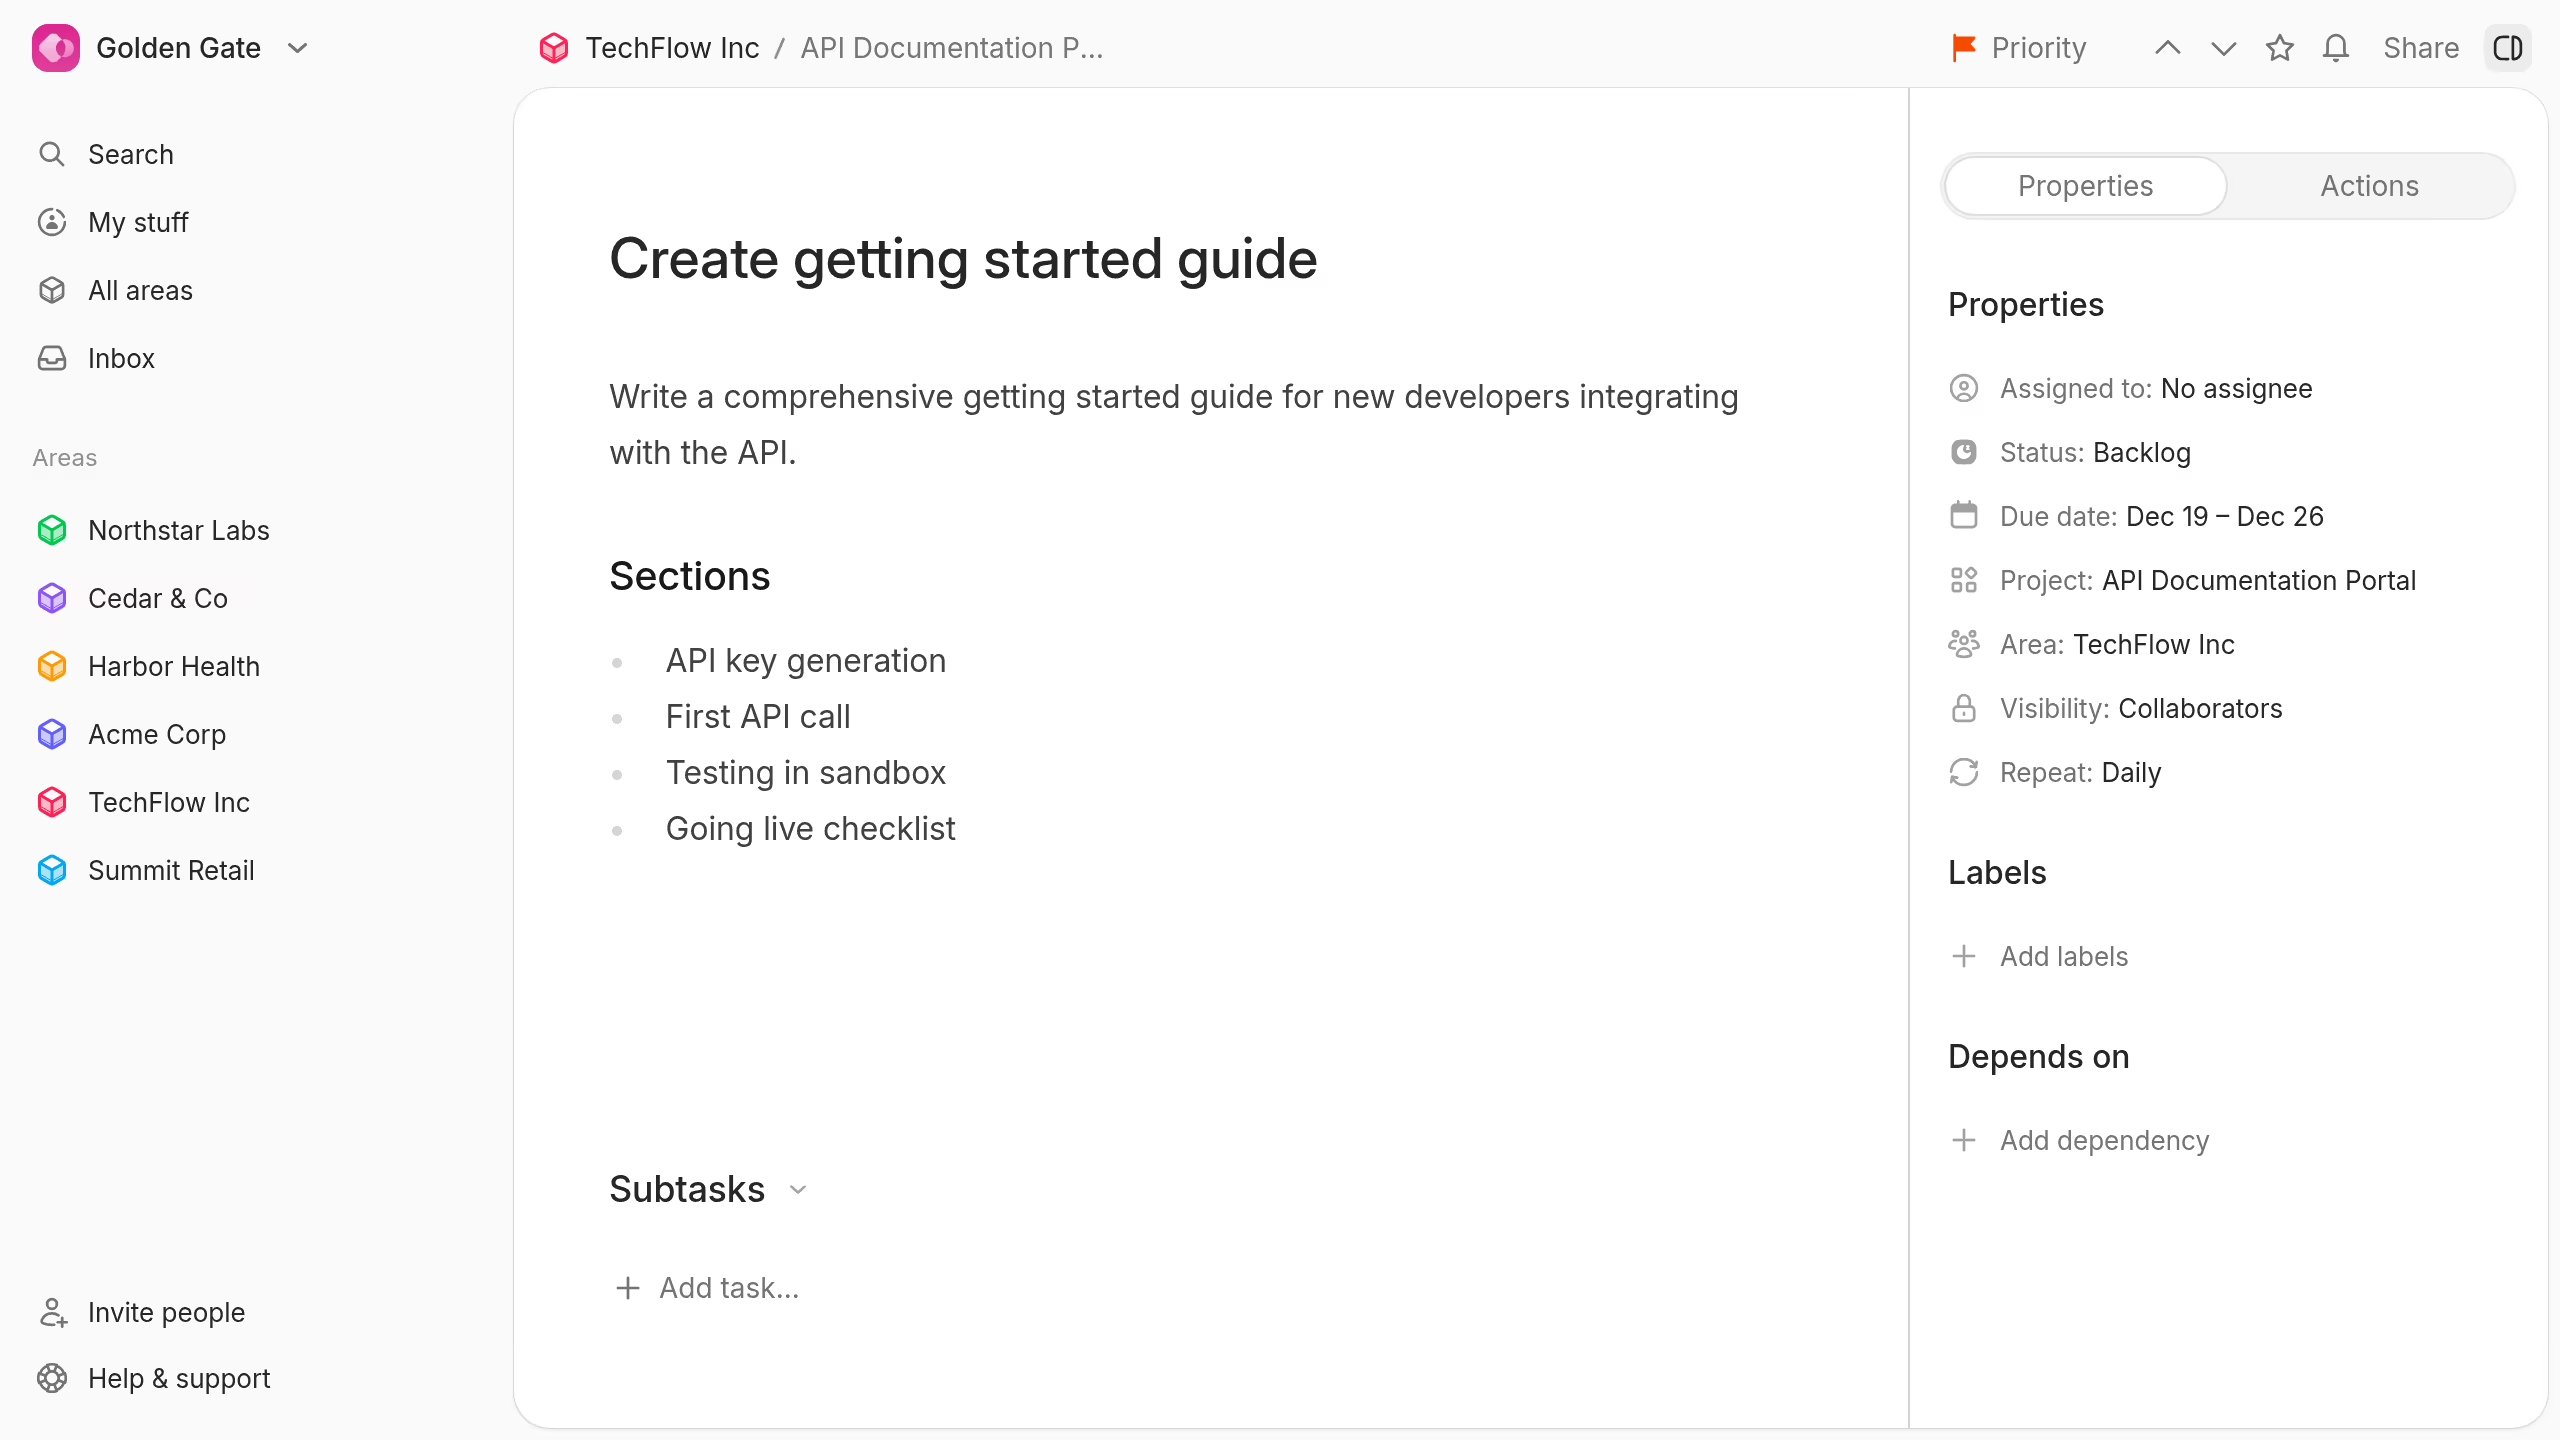
You can change these properties:
- Assigned to: Choose an area, project, or task collaborator.
- Status: Move the task through the area's workflow.
- Due date: Add a due date or a start and due date range.
- Project: Add the task to a project or remove its current project.
- Area: Move the task to another area.
- Visibility: Control who can find and open the task.
- Repeat: Create a repeating schedule.
- Labels: Add one or more area labels.
- Depends on: Link work that must finish first.
Changes save as you make them.
Change status
Select Status in the properties panel, then choose an area status.
You can also select the status control from a task row. Select the completion control to mark the task as done.
If another task blocks completion, Plot asks whether to ignore or remove the blocker.
Add dates
- Select Due date.
- Choose a suggested date, enter a date, or use the calendar.
- Turn on Start date when the task spans a date range.
Use a due date for a deadline. Add a start date when timing or a timeline view matters.
Add labels and priority
Select Add labels, then choose an existing area label. You can create a label from the same menu.
Use Mark as priority from the task menu when the task needs extra attention.
Labels help classify work. Priority gives urgent work a clear visual signal.
Add a task to a project
- Open the task.
- Select Project.
- Choose a project or select Create new project.
Select Remove project to return the task to area-level work.
Move a task to another area
- Open the task.
- Select Area.
- Choose the destination area.
The destination area controls the task ID, statuses, labels, and default access.
Plot asks for a replacement when the current status is unavailable in the destination area. An incompatible project can also be removed.
Add subtasks and dependencies
Use Add task... under Subtasks to break work into smaller steps.
Use Make subtask of... from the task menu to place an existing task below another task.
Select Add dependency when this task must wait for another task. Plot shows the relationship on both tasks.
Use other task actions
Open the task menu to copy its link or ID, duplicate it, add it to favorites, or delete it.
Deleted tasks stay in the area's Trash for seven days. Restore them from there when needed.